
Generate Data Simply with GenManip
GenManip is not complicated — let’s get started quickly and generate some data in a predefined scene. We only need to do two things:
- Understand the scene file structure of GenManip.
- Understand the Config used by GenManip.
Download and Run Isaac Sim
In the Quick Start section, we installed Isaac Sim via Miniconda, which allows us to run programs that use the Isaac Sim libraries directly with the python command. However, another approach is to use the Isaac Sim binary package.
You can find and download the 4.1.0 archive here. Using the binary package allows you to launch the Isaac Sim GUI application, which is helpful for editing scenes.
Of course, if your goal is simply to generate data with an existing configuration, you just need to make sure the assets and Config are ready, and then run:
python demogen_V4.py -cfg configs/tasks/xxx.ymlpython render_V3.py -cfg configs/tasks/xxx.ymlA typical workflow might be:
- Edit the scene locally or verify the feasibility of your task using the GUI.
- Use
rsyncto sync your local configuration files and assets with a remote server. - Run large-scale data generation on the server.
After downloading the Isaac Sim package, run the isaac-sim.selector.sh script and select the default option to launch Isaac Sim.
If you have already downloaded some GenManip assets, navigate to GenManip-Sim/saved/assets/scene_usds/debug_scenes/banana_plate_scenes/ and double-click base.usda to view the scene.
Click the Play button on the left to start the simulation. You can apply force to objects by holding Shift + Left Click.
⚠️ Remember not to save when exiting.
Scene File Structure in GenManip
GenManip’s Minimal Config runs in a simple scene called Banana Plate Scene. This scene consists of a table, a banana, a plate, and a Franka robotic arm. The task is to place the banana into the plate.
Open the .usd (not .usda) file to inspect the basic structure of the scene.
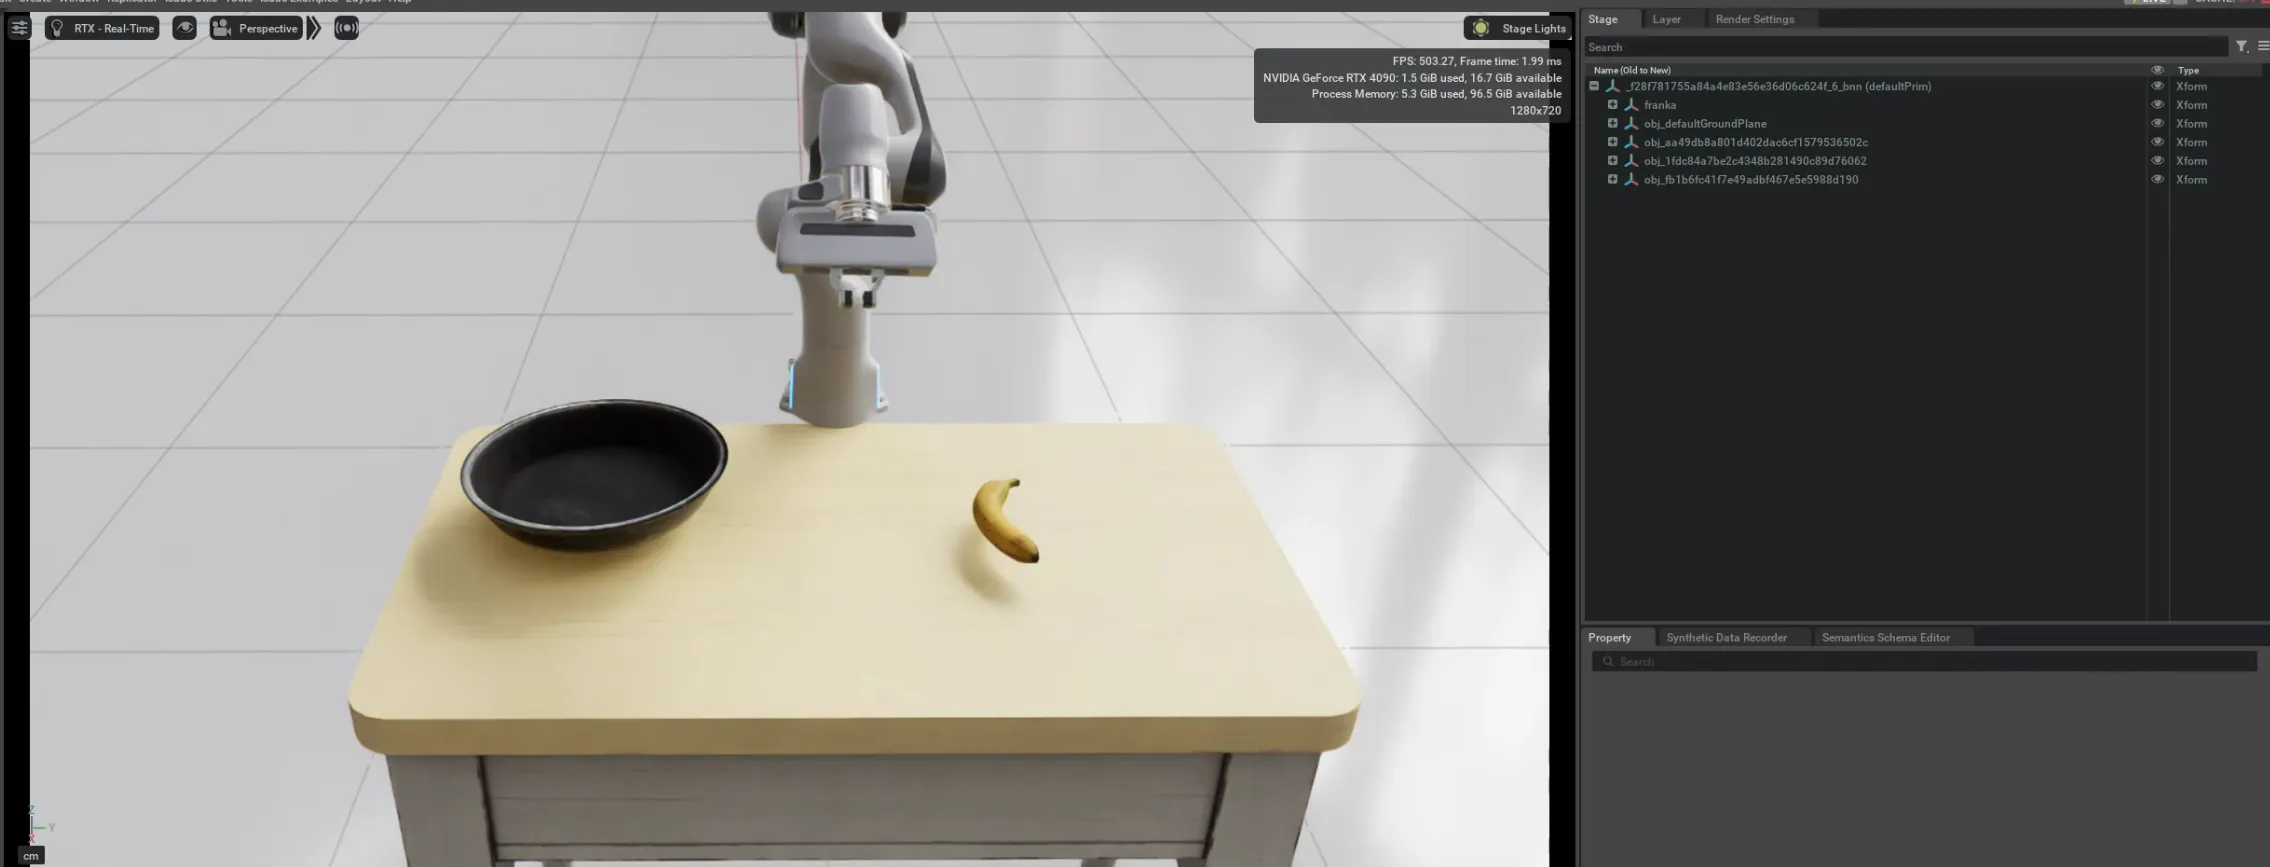
Looking at the hierarchy on the right, you’ll notice a two-layer structure. The parent node is a scene UUID — the name of this node can be arbitrary.
Under this scene UUID, multiple objects are included: the table, banana, plate, and Franka arm.
All objects except the robotic arm are named in the format obj_<uid>. The obj_ prefix indicates that these objects will be added to GenManip’s Object List and can be referenced in the Config.
If your project generates a scene and you want to use GenManip for data generation, you should restructure the scene into this format. If you are building a scene manually (we will explain how in the Generate Your Own Data / Benchmark chapter), make sure to rename the objects accordingly.
GenManip’s Config also supports (and for advanced users, most commonly uses) adding objects into an empty .usd file based on folder or filename, and arranging them according to a scene graph or randomized placement rules. These capabilities will be discussed in the Advanced Data Generation chapter.
GenManip Config
Below is the Minimal Config for GenManip. It may look long, but don’t worry — we’ll understand everything in just a few minutes:
demonstration_configs:- domain_randomization: cameras: config_path: configs/cameras/fixed_camera.yml type: fixed random_environment: has_wall: false hdr: false robot_base_position: false robot_eepose: false table_texture: false table_type: false wall_texture: false rewrite_instruction: false generation_config: action_path: mode: auto robot: 0 articulation: [] goal: - - obj1_uid: - '0' obj2_uid: - '1' position: - top fixed_position: true allow_fixed_grasp: true force_fixed_grasp: true mode: manual planner: curobo instruction: put the banana on the top of the vintage rusty frying pan. layout_config: ignored_objects: [] type: None mode: manual num_episode: 10 object_config: '0': type: existed_object uid_list: - fb1b6fc41f7e49adbf467e5e5988d190 '1': type: existed_object uid_list: - 1fdc84a7be2c4348b281490c89d76062 preprocess_config: - config: config: default type: convexDecomposition type: collider - type: ccd robots: - config: gripper_type: panda_hand type: franka table_uid: aa49db8a801d402dac6cf1579536502c task_name: Banana/banana_plate_4035_none-wow-wot-woh-now usd_name: scene_usds/debug_scenes/banana_plate_scenes/baseevaluation_configs:- domain_randomization: cameras: config_path: configs/cameras/fixed_camera.yml type: fixed random_environment: has_wall: false hdr: false robot_base_position: false robot_eepose: false table_texture: false table_type: false wall_texture: false rewrite_instruction: false generation_config: action_path: mode: auto robot: 0 articulation: [] goal: - - obj1_uid: - '0' obj2_uid: - '1' position: - top fixed_position: true allow_fixed_grasp: true force_fixed_grasp: true mode: manual planner: curobo instruction: put the banana on the top of the vintage rusty frying pan. layout_config: ignored_objects: [] type: None mode: manual num_test: 10 object_config: '0': type: existed_object uid_list: - fb1b6fc41f7e49adbf467e5e5988d190 '1': type: existed_object uid_list: - 1fdc84a7be2c4348b281490c89d76062 preprocess_config: - config: config: default type: convexDecomposition type: collider robots: - config: gripper_type: panda_hand type: franka table_uid: aa49db8a801d402dac6cf1579536502c task_name: Banana/banana_plate_4035_none-wow-wot-woh-now usd_name: scene_usds/debug_scenes/banana_plate_scenes/baseSince YAML syntax can be a bit hard to read, you can convert it to JSON for easier understanding. GenManip also supports using JSON as the input format for Config files.
Here we see two main sections: demonstration_configs and evaluation_configs.
Each contains a single dictionary. The two dictionaries are almost identical, except for the num_episode and num_test fields — indicating how many data samples and test cases will be generated, respectively.
GenManip supports running multiple data generation or evaluation tasks sequentially in one program. This is why they are structured as lists. Functionally, it’s equivalent to running separate Configs multiple times — just more convenient.
Let’s focus on the single dictionary inside demonstration_configs to understand its structure. It contains domain_randomization, generation_config, layout_config, object_config, and other sections, which we’ll explain one by one.
Domain Randomization
The Domain Randomization section contains settings for randomizing elements such as cameras, environment, robot, table, and walls.
Most entries here are set to false (disabled). We’ll cover these options in detail in the Advanced Data Generation chapter.
The most important part is the camera configuration, which references a Config file using a path relative to the project root.
Generation Config
The Generation Config section defines various task generation settings.
The most crucial part is Goal, which defines the target configuration using a scene graph — currently primarily describing pick-and-place tasks.
goal is a nested list:
- The outer list represents logical OR.
- The inner list represents logical AND.
For example:
[[{banana → left of plate}], [{banana → right of plate}]]means the banana can be placed either on the left or right of the plate.[[{banana → left of plate}, {cup → right of plate}]]means the banana must go on the left and the cup must go on the right.
Each goal entry contains obj1_uid, obj2_uid, and position, indicating that obj1 should be placed relative to obj2 at the specified position.
Grasp poses are typically obtained via an AnyGrasp server (see Install AnyGrasp for details).
However, if allow_fixed_grasp and force_fixed_grasp are set, GenManip computes a top-down grasp pose directly from the object’s mesh and position.
Similarly, fixed_position constrains the target position to the center of obj2.
The minimal form only requires obj1_uid, obj2_uid, and position. In this case, GenManip queries AnyGrasp for a random grasp pose and places the object at a random location that satisfies the goal.
- Action Path: Usually set to
auto, withrobot: 0. GenManip will automatically infer the action sequence from the goals. - articulation, mode, and planner: These should remain as-is. Although
mplibwas supported previously,curobohas shown better performance and is now the default.
Layout Config
This section defines layout-related settings.
In the minimal config, it is set to None, meaning the layout in the scene file is preserved without randomization.
More advanced layout options will be introduced later.
Object Config
The Object Config section maps meta objects to actual scene objects.
In the example above, there are two objects (0 and 1), both of type existed_object.
They map to objects at paths:
/scene_uid/obj_fb1b6fc41f7e49adbf467e5e5988d190/scene_uid/obj_1fdc84a7be2c4348b281490c89d76062
These IDs correspond to the ones used in the Goal section.
This design makes it easy to scale up data generation. For example, replacing the config with:
"0": filter_rule: [] max_cached_num: 50 option: [] path: object_usds/objects type: load_object_from_path"1": filter_rule: [] max_cached_num: 50 option: [] path: object_usds/containers type: load_object_from_pathwill load 50 objects and 50 containers from the respective folders. For each data sample, one object and one container will be randomly activated, and the task “place object into container” will be executed — with all other settings identical to the minimal config.
More details on this are available in the Advanced Data Generation chapter.
Other Settings
Other fields include instruction, mode, num_episode, preprocess_config, robots, table_uid, task_name, and usd_name.
- instruction: Task description.
- num_episode: Dataset size.
- preprocess_config: Preprocessing steps. Usually
Noneby default. If you manually build a scene, these can help automatically configure physical properties (see Generate Your Own Data / Benchmark). - robots: Robot configuration. The default is a Franka arm with a Panda hand gripper.
- usd_name: Path (relative to
saved/assets) of the scene file. - table_uid: UID of the table in the scene. GenManip mainly focuses on tabletop manipulation in the current version, but multiple tables or table-free scenes are supported (see Advanced Data Generation).
Generated data is saved in:
- Planning data:
saved/demonstrations/<task_name>/trajectory - Rendering data:
saved/demonstrations/<task_name>/render
Summary
Once you understand the structure of GenManip’s Config, you don’t need to know much more. For tasks involving manually prepared scenes where you only need to generate data, simply modify the minimal config by following these steps:
-
Edit your scene manually, ensuring that object names follow GenManip’s naming conventions.
-
Update the following fields in the Config:
task_name: Your task nameusd_name: Relative path to your scene filetable_uid: UID of the table in your sceneinstruction: Description of your task
-
Set
num_episodeto the desired number of samples. -
Update
object_configto match the objects in your scene.0and1correspond to the two objects involved in the task.- You can also add more elements to the Goal list to create long-horizon tasks or tasks with multiple success criteria (details in Advanced Data Generation).
-
Run:
Terminal window python demogen_V4.py -cfg configs/tasks/xxx.ymlpython render_V3.py -cfg configs/tasks/xxx.yml
More detailed instructions — along with a video tutorial demonstrating how to generate a dataset or test cases in under five minutes — will be provided in the next chapter.